

Note
Go to the end to download the full example code.
3D DEM manipulation#
Applying 3D rigid transformations to DEMs is facilitated by the use of several functions, depending on the needs. This can be useful for correcting certain shifts when they are known in advance.
- In this page, we will show you how to properly do :
a simple translation with translate with
translate()a simple rotation (with a translation) with
apply_matrix()a complex rotation (with a translation) with
matrix_from_translations_rotations()inapply_matrix()
import numpy as np

import xdem
We load a DEM and crop it.
### Translation
To translate a DEM by a shift (x, y, z) in CRS unit, we can use the translate() function like this :
shift_x, shift_y, shift_z = (3 * dem.res[0], 5 * dem.res[1], 20)
dem_shifted = dem.translate(shift_x, shift_y) + shift_z

dem_shifted.plot(cmap="terrain", cbar_title="Elevation (m)")
dem.get_footprint_projected(dem.crs, densify_points=5000).plot(ec="k", alpha=0.4)
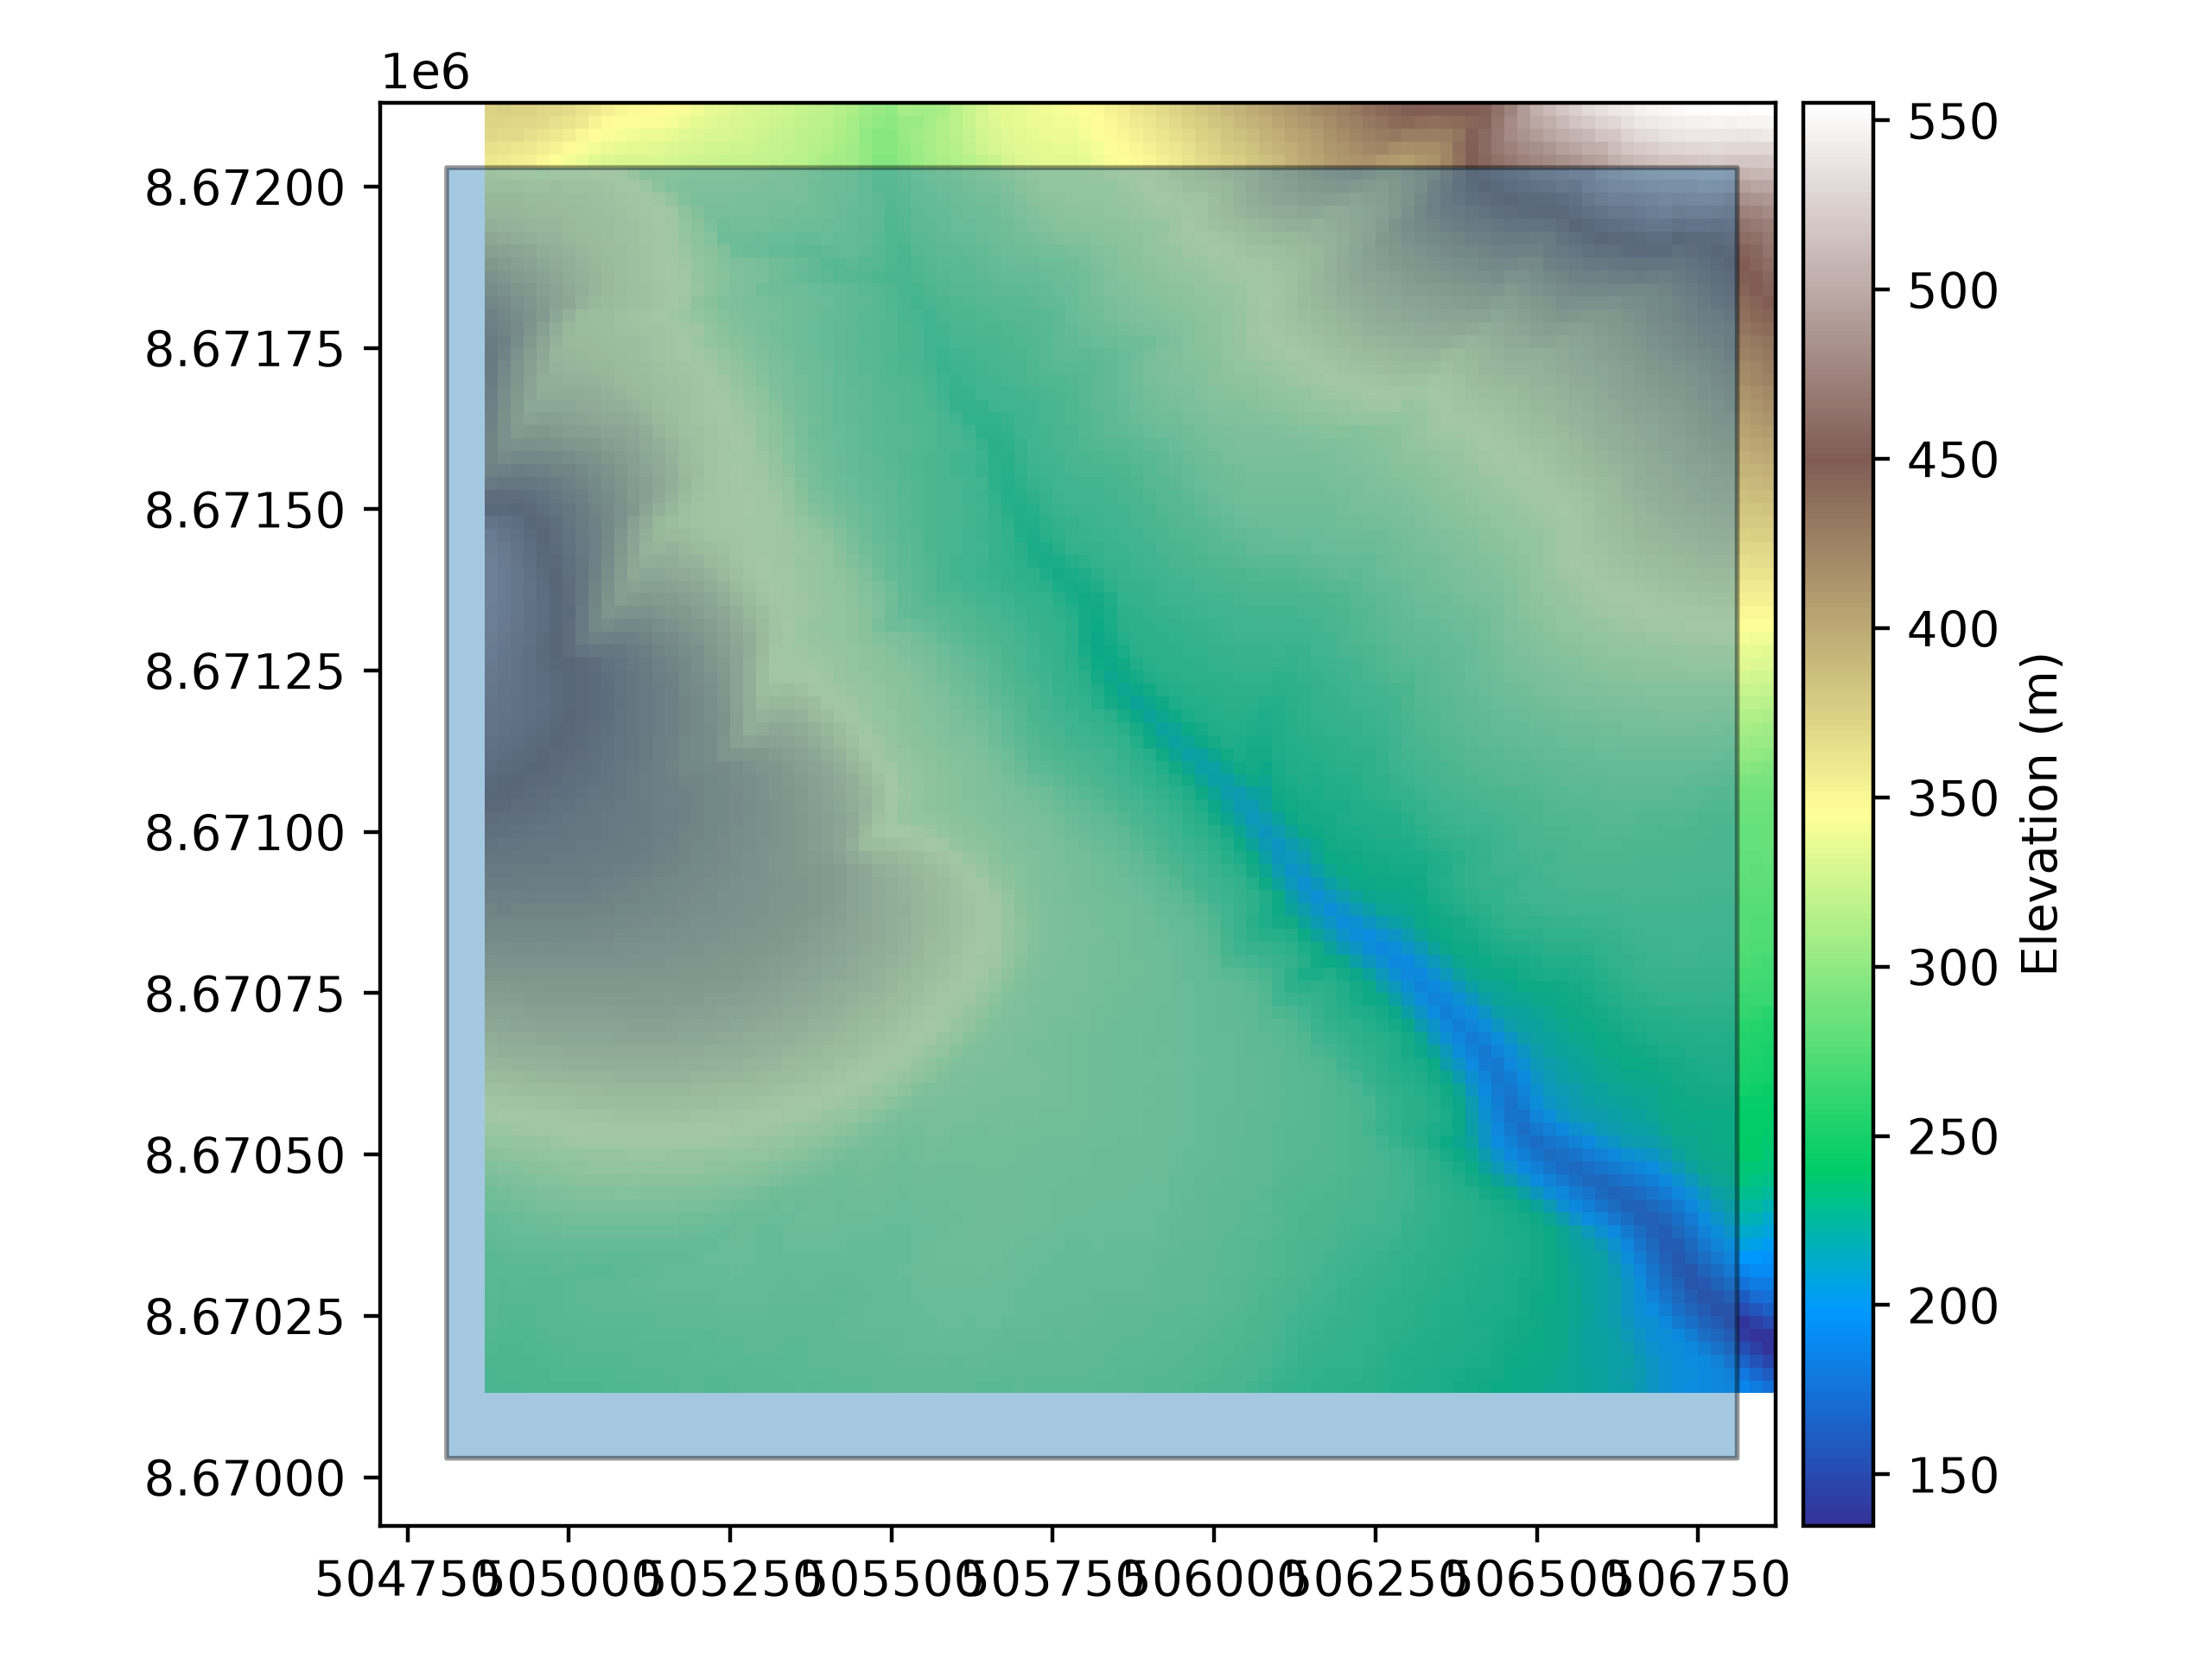
Here the new DEM and the footprint of the original DEM. Note that the translation only updates the geotransform (no resampling is performed).
### Rotation and translation
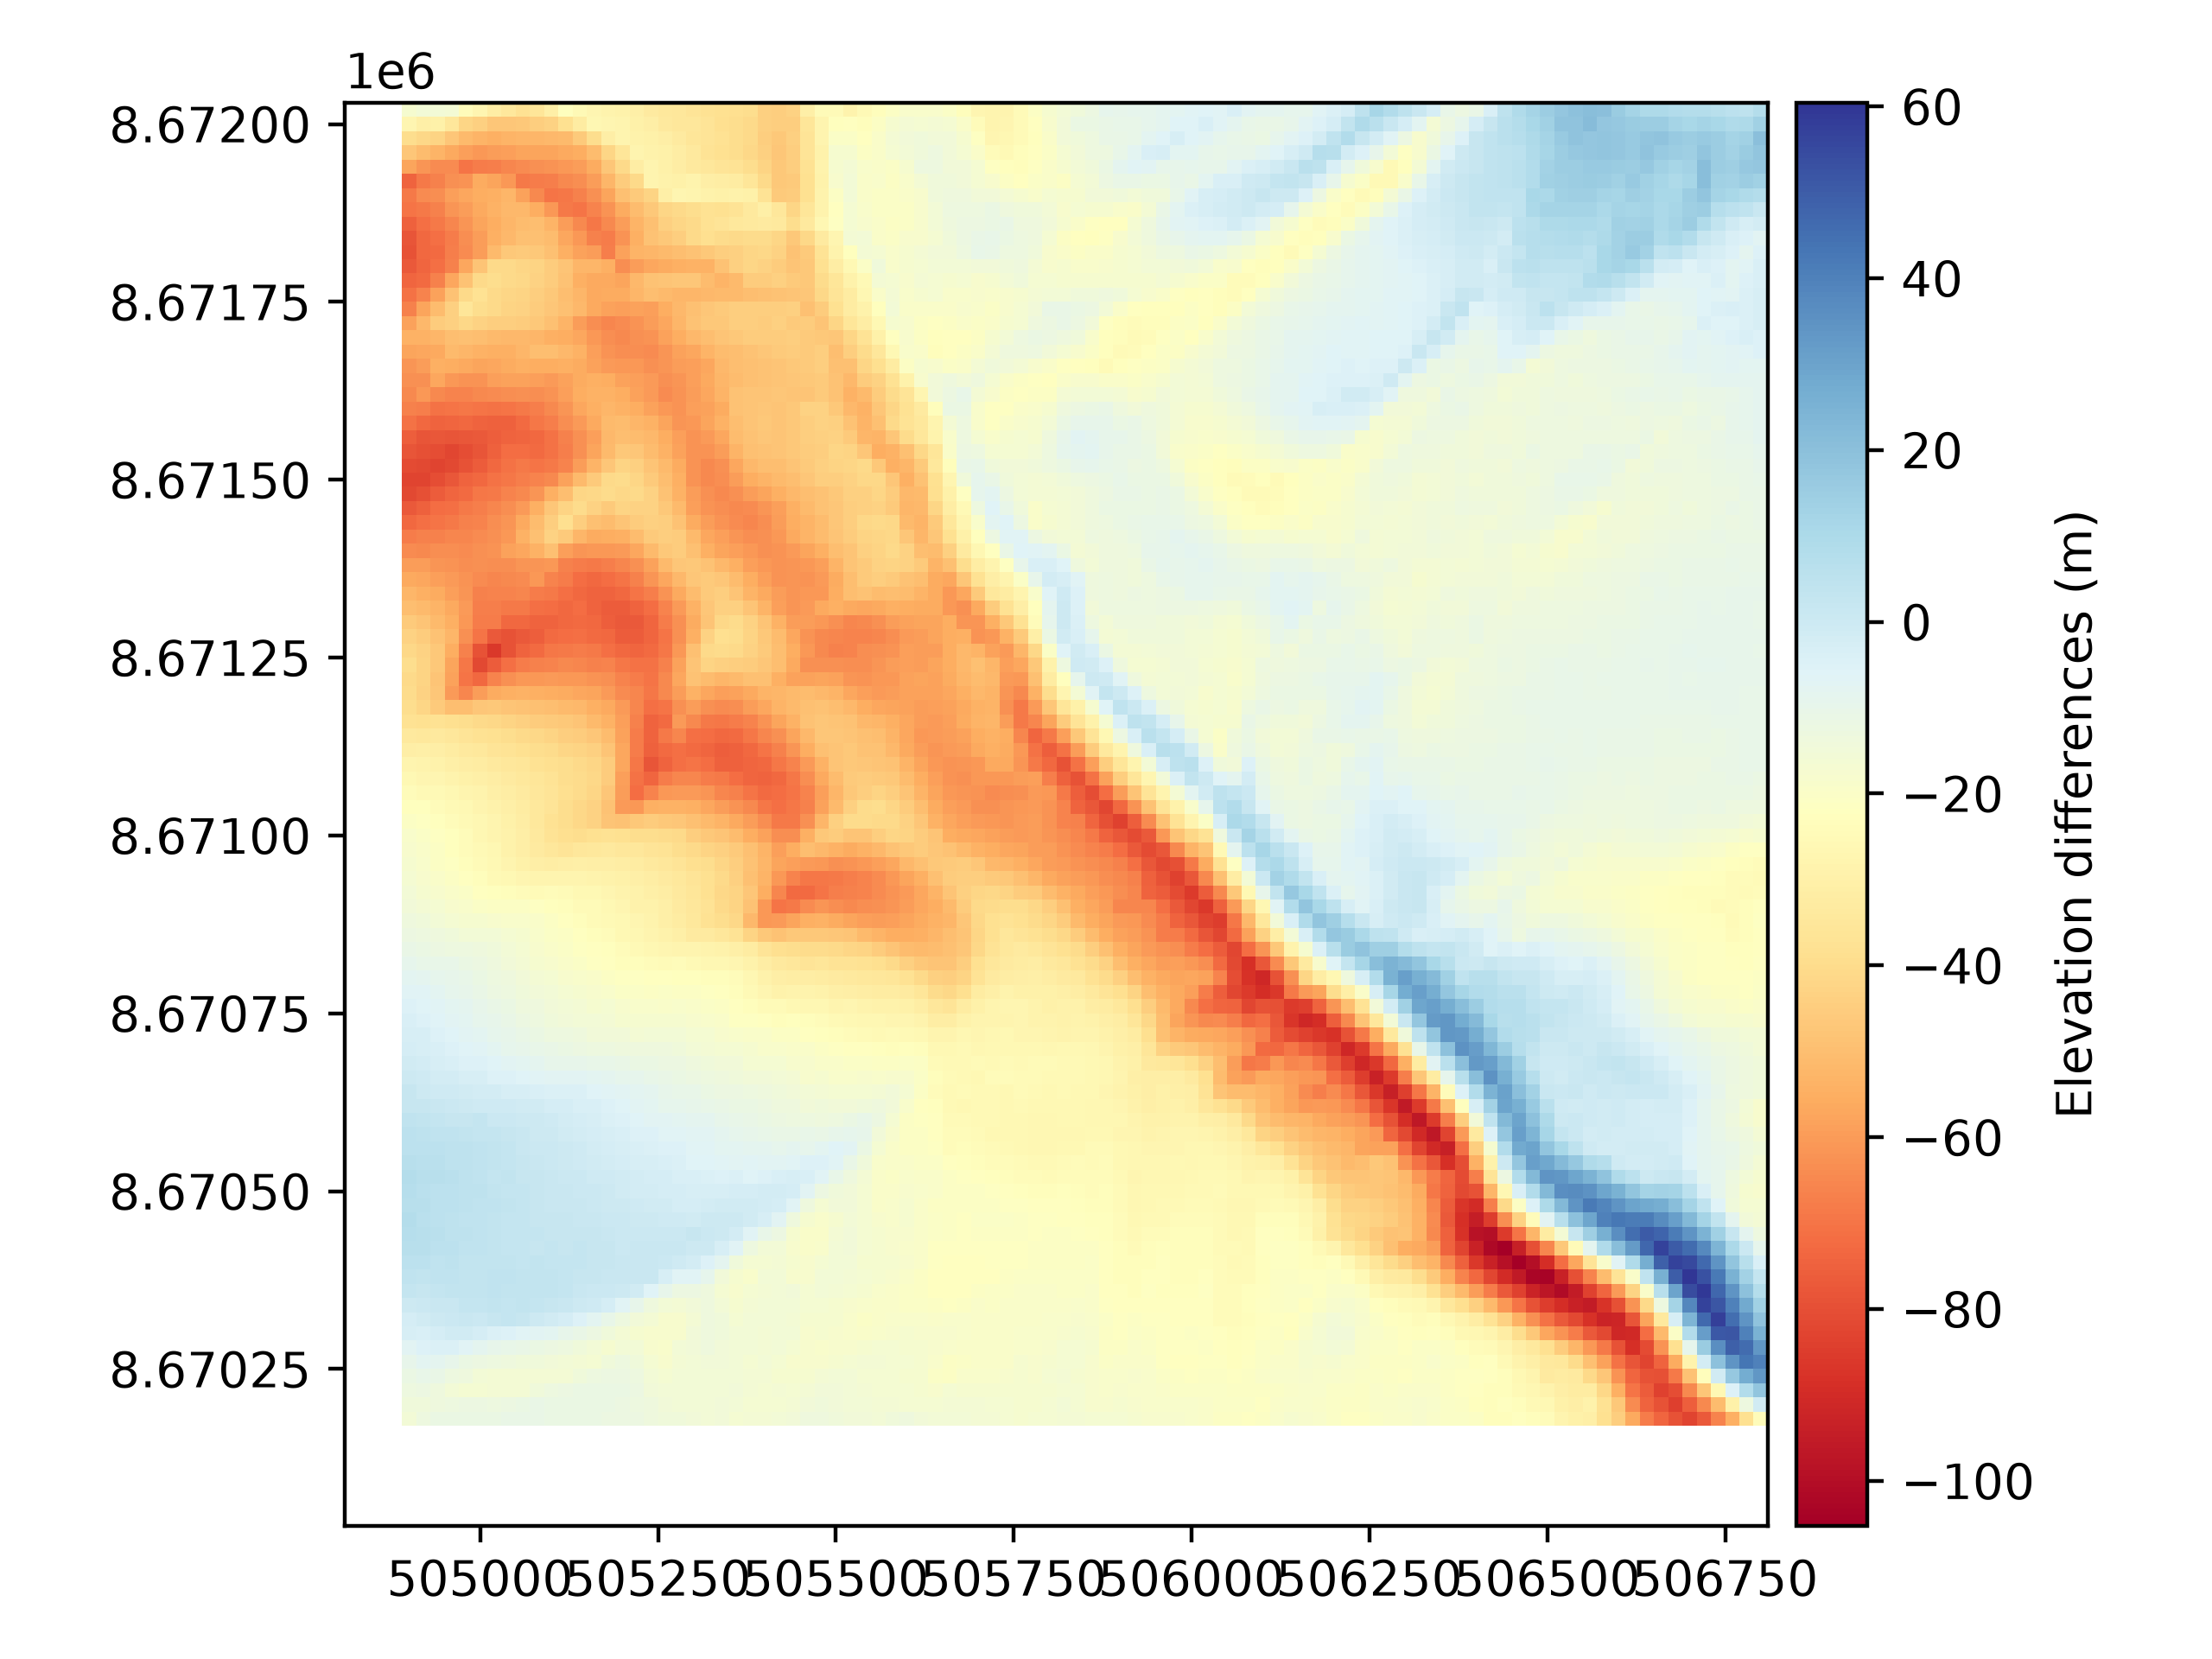
#### With a manually constructed matrix To perform a rotation, we need a transformation matrix. Here, a rotation of 0.6° in X (across-track) is attempted with the previous rotation.
# Rotation and translation matrix 4*4
rotation = np.deg2rad(0.6)
matrix = np.array(
    [
        [1, 0, 0, shift_x],
        [0, np.cos(rotation), -np.sin(rotation), shift_y],
        [0, np.sin(rotation), np.cos(rotation), shift_z],
        [0, 0, 0, 1],
    ]
)

# Centroid of the rotation
centroid = [dem.bounds.left + dem.width / 2, dem.bounds.bottom + dem.height / 2, np.nanmean(dem)]

# Application
rotated_dem = xdem.coreg.apply_matrix(dem, matrix=matrix, centroid=centroid)
We can plot the difference between the original and rotated DEM. Even if a translation is applicated with a rotation, the transform and the footprint are the same before and after.
Keep in mind that depending on the centroid and the value of the rotation, the shift in certain areas of the image can be very significant. Depending on the terrain configuration, some pixels may extend beyond the result “frame”.
diff_before = dem - rotated_dem
diff_before.plot(cmap="RdYlBu", cbar_title="Elevation differences (m)")
#### With an automatically constructed matrix
When several rotations and translations are combined, the rotation matrix can be really hard to compute. To do this, you can use the function matrix_from_translations_rotations().
Here is an example of a rotation of 0.1 degree in X, 0.2 in Y and 0.3 in Z with the previous shifts (shift_x, shift_z, shift_z).
array([[ 9.99980200e-01, -5.22986361e-03,  3.49973673e-03,
         6.00000000e+01],
       [ 5.23593193e-03,  9.99984801e-01, -1.72702754e-03,
         1.00000000e+02],
       [-3.49065142e-03,  1.74531773e-03,  9.99992385e-01,
         2.00000000e+01],
       [ 0.00000000e+00,  0.00000000e+00,  0.00000000e+00,
         1.00000000e+00]])
rotated_dem = xdem.coreg.apply_matrix(dem, matrix=matrix, centroid=centroid)
diff_before = dem - rotated_dem
diff_before.plot(cmap="RdYlBu", cbar_title="Elevation differences (m)")
rotated_dem.get_footprint_projected(dem.crs, densify_points=5000).plot(ec="k", alpha=0.1)
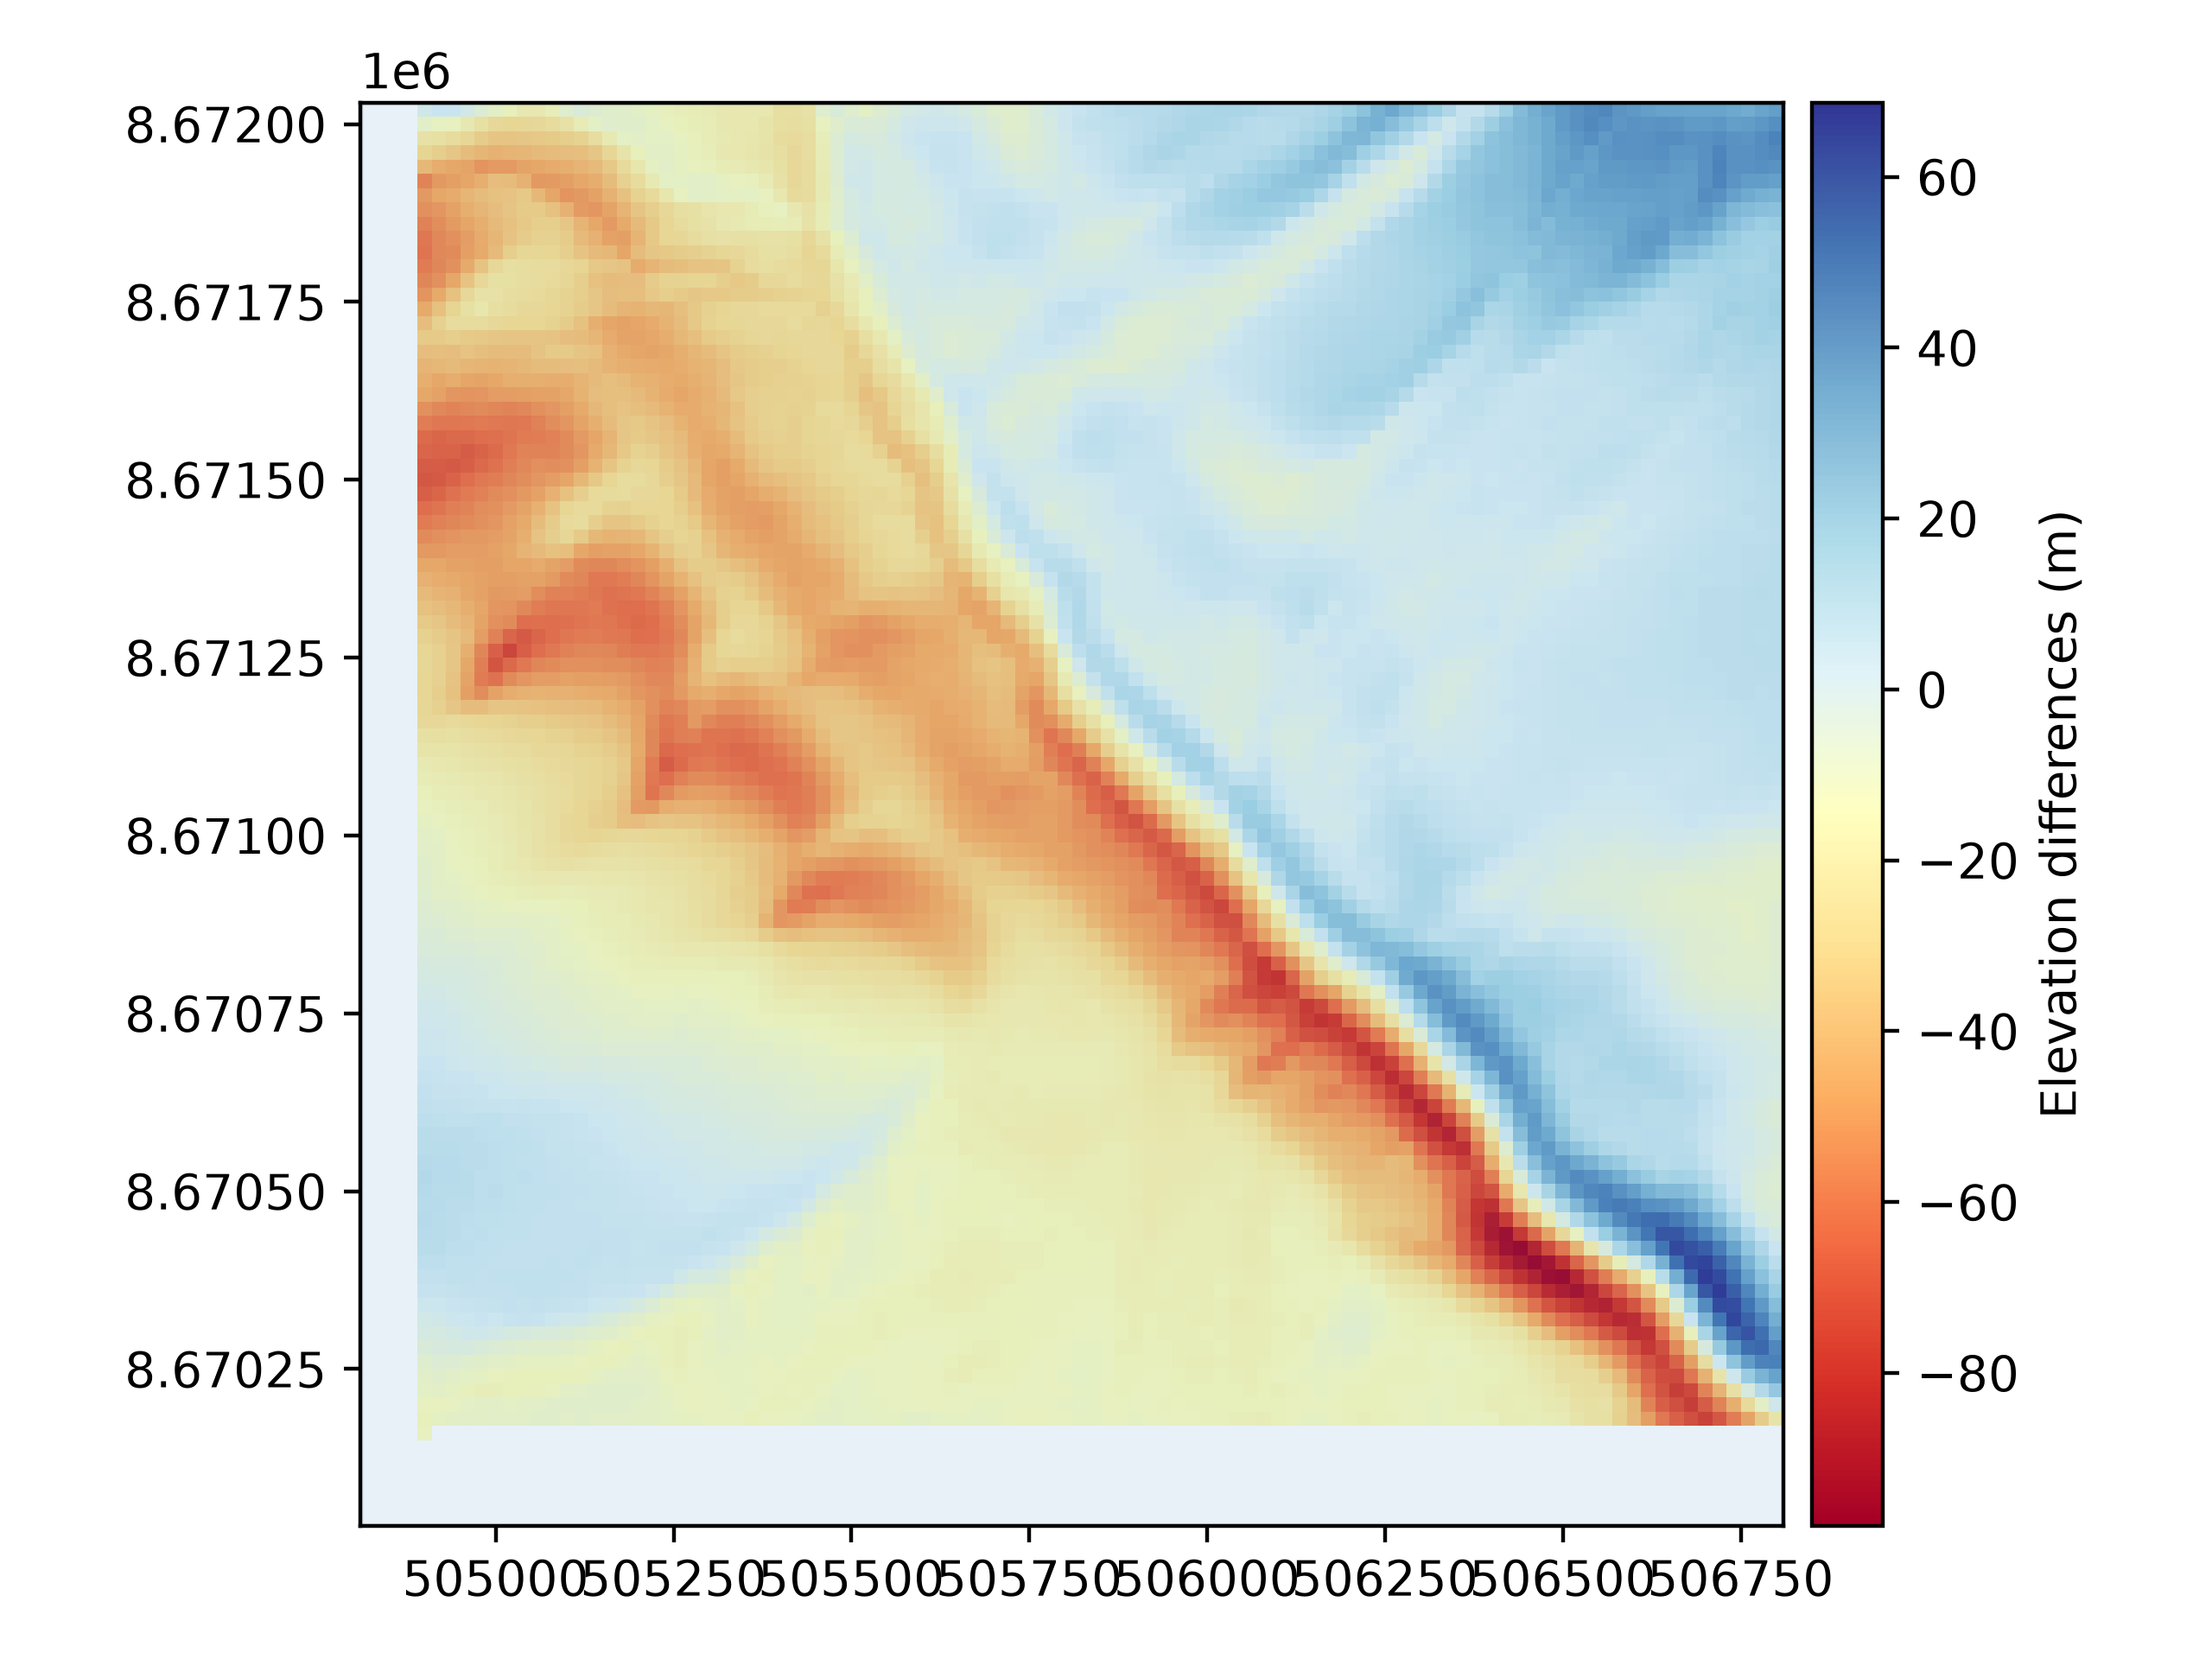
Even if a translation is applicated with a rotation, the transform and the footprint are the same before and after.
Total running time of the script: (0 minutes 1.695 seconds)